I Took The Handmade Pledge! BuyHandmade.org
Showing posts with label flowers. Show all posts

Wednesday, August 4, 2010

etsy how-to: bridal bouquet

Oh man, why couldn't Etsy have posted this post in their Handmade Weddings series two months ago? The tip to wire shorter stems to longer ones? Genius! And that lace wrap makes me seriously jealous.


If you're thinking about DIY-ing any bouquets, I'd highly recommend that you check it out.

Monday, July 19, 2010

DIY flower suggestions

After writing three parts about the seemingly never-ending drama surrounding our wedding flowers, I thought it might be encouraging for those of you considering the DIY flower route to compile a list of tips.

Coming from the other side, I can't guarantee that it will be easy. In fact, I'd like to guarantee that it won't be easy. Realistic? Yes. Depressing? No.

Despite the drama and difficulties we faced due to our decision to go DIY, I wouldn't change a thing. So, you ambitious amateur florists, here's some things to keep in mind:

- Don't be intimidated. People make such a big deal about flowers but they're not scary. If you've done your research, it's nothing to panic about. Everyone has a florist hidden inside them somewhere. So don't listen to all the people that will tell you that "doing your own flowers will stress you out like crazy. And who wants stress the day before their wedding?" No one. Good thing flowers aren't that stressful.

- Do them the day before. Unless your wedding is at 9 pm, chances are you won't have enough time to arrange on the big day. Plus, it's good for the flowers to be freshly cut and soaked overnight before the wedding because it keeps them looking fresh.

- Have help. Lots of it. Your hands will thank you. If I'd had to hold that bouquet for 40 minutes by myself, my fingers may have fallen off. Plus, without help, it would likely take upwards of 5 hours.

- Use your help. If you're anything like me, you'll think you can do it all yourself. There's no point in having helpers if you're going to insist upon arranging each and every bouquet personally. Have the final say before the bouquets get taped if you want, but let your helpers divide the brunt of the work amongst themselves.

(all photos by our wedding photographer; click images to enlarge)

- Step away. Get one of your helpers to hold the bouquet a few feet away from you so you can see what it really looks like. I held my bouquet for 30 minutes straight but it wasn't until one of the girls took it from me and stood back that I could really see what it looked like. After that, I was able to better judge where flowers needed to be added to fill holes.


- Have tons of rubber bands on hand. I mentioned before how most people insist upon taping the bouquets as each flower or two is added, but as an indecisive person, this never would have works for me. It took me about 10 minutes to get the bouquet together and I spend the next 40 picking out certain stems to move them here or there, adding different types or colors, and just a whole lot of general rearranging. If you rubber band the bouquet when you think you might be done, you can step back and take a look without it falling apart but it also gives you the chance to make changes.

- It doesn't have to be perfect from all sides. No matter what I did, there was one side of my bouquet that didn't look quite right. Instead of trying to add more flowers to the already full bouquet, I just decided to hold it from a different angle. (Adding a brooch or pin of some sort will help you remember which side is the front on the wedding day.)

- I said it before and I'll say it again: be flexible with your flower selection. If you're depending on grocery stores or Farmer's markets like I did, you'll want to have a few different ideas lined up. I didn't get the wildflower bouquet I was thinking of, but I'd seen so many other bouquets that I knew peonies and spider mums would work. Typically, grocery stores don't stock certain sought after flowers like Calla Lillies or peonies, so be prepared for that. If you have your heart set on something, make sure you pre-order. You can still arrange them yourself, but at least you'll have the guarantee that your favorites will be there.


- Buy floral tape. Lots of it. Normal tape probably won't cut it. And if you want things to be extra secure, buy floral wire and corsage pins from a place like Michaels or Wal-Mart.

- When in doubt, add foliage. Even if its stuff you collect from your backyard (like we did), it'll add some dimension to the bouquets and provides a cheap way to fill out a bouquet if you're on a strict budget. And hell, even if you're not on a budget, it looks cool.


- Most importantly, stay calm and do what feels right regardless of your preconceived notions about what kind of flowers you'd have or what shape the bouquets would be. Remember that, despite all your careful planning, DIY projects don't always turn out exactly how you think they will. But keep in mind that this doesn't mean your flowers will be any less amazing than you were hoping they'd be.

(I say this, specifically, because I would have loved for someone to remind me of this very fact when I was freaking out at the grocery store...)

Wednesday, July 14, 2010

our wedding: flowers pt. 3

Okay, so, flower crisis has been averted.

Pretty flowers are in hand.
Months of research on assembling bouquets is in my brain.
I have 4 beautiful women and 1 man strangely fascinated with floral arranging to help in the assembly process.

The only problem? There's about an hour of daylight left and we have 5 bouquets to make.

As the boys assemble the rest of the tents and start setting the tables in their place, the ladies are left to the flowers. My sister/maid of honor could not have been more in her element. She has a dormant talent for flower arranging. I think it comes from the long line of gardeners in our family.

And I could not have loved her more for it on that day. As much as I researched, I'm not the most creative when it comes to arranging. I can put flowers into a bouquet, sure, but my sister has a gift.

She spent the first 10 minutes of the assembly process running around the property of the cottage and collecting foliage which would add more green to the $15 Costco bouquets. The other girls spent time splitting up the gigantic bouquets into something more manageable and I started on my bouquet.

And for the next 40 minutes, the rest of us sat around acting as servants to my sister, the flower goddess, as she did what she does. We'd pass her tape, wire, foliage, or peonies but it was all her. As casual and laid back as she usually is, I'd never seen her more focused as she was in front of that table covered in flowers and greenery. She was forever concerned with symmetry and did her best to make sure the bouquets were shaped properly.

While she did her thing, I put my research skills to good use on my bouquet. If you're in need of a tutorial, seriously, use this one from Design*Sponge. I studied that page intently in the days before the wedding and it turned out to be ridiculously useful.

Tying a rubber band around the stems once you have the shape you want... genius. I'd seen other tutorials which advise that you use floral tape every time you had 3-4 more flowers, but I prefer the rubber band method because it allowed me to make changes. Which I did. Many times. I moved flowers that had been squished when I added more. I moved white spider mums out of the way and replaced them with lavender ones. And the ability to easily change the shape at the drop of a dime made the rubber band method invaluable to me.

As much as I love the rubber band method, there is one issue with it: it's not a one-person process. Unlike the taping process, the rubber band method leaves the flowers fairly loose. As good as this is for making alterations, it doesn't give the bouquet much structure and putting them down is not an option if you want to maintain the shape. Holding onto that many flowers for a lengthy period of time hurts the hands so I did a relay with one of my bridesmaids.

Once I had the shape and fullness I wanted, I held the bouquet and she wrapped the whole thing very tightly with floral tape. Success! 20 minutes of floral arranging and we had ourselves a bridal bouquet. I make it sound, easy, I know. But it actually was. Once we had the flowers, the process was pretty straight forward. I tell you, research, research, research.

And within an hour, my sister had also completed the bridesmaids bouquets. She likely would have been done earlier if it weren't for her perfectionist attitude when it comes to floral arranging. But I love her for that too because the bouquets were beautiful.

my sister/MOH's bouquet (photo by me)


photos by our amazing photographer, Julie (click photos to enlarge)

The bouquets for the flower girls were a cinch. We bought one bunch of gerbera daisies in hot pink, split them up, and turned them into 2 bunches of 2 flowers. Add some floral tape and polka dot ribbon that I already had and they were the easiest of the bunch.
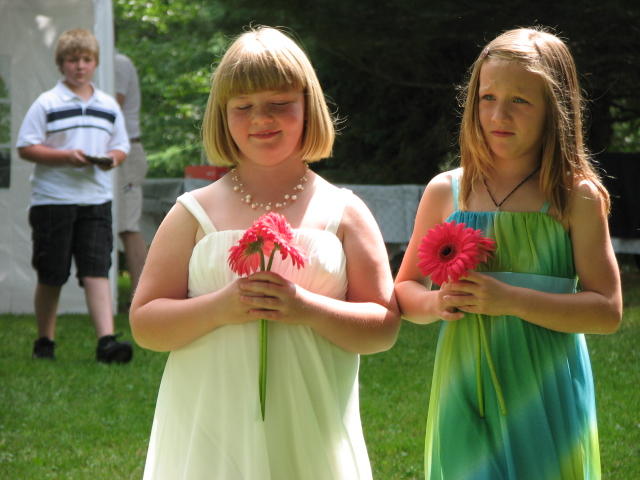
our pretty, pretty flower girls with their flowers (guest photo)

We let everything soak in water over night (in a cool, shady place, which is key, by the way) and the morning of the wedding, we wrapped them in ribbon... white for the girls and ivory lace for mine. A little hot glue held the ribbon on securely.

In addition to being fun, the process was a dream for our bank account too. Here's the cost breakdown:

2 bouquets from Costco: $35
3 bunches of spider mums (in white and lavender) from grocery store: $14
1 bunch of gerberas from grocery store: $7
floral tape: $5
ribbon: free! because I already had it
foliage: free! c/o Mother Nature

Total cost for 5 bouquets and 2 flower girl bunches: $61

Thinking about it now, I could not be happier with our decision to DIY the bouquets. We got so many compliments on them and half a dozen people asked me which florist had done my bouquet. Even the people who had previously told me that it would be too stressful of a process seemed impressed. (So ha!)

The desire to impress people aside, we also ended up saving tons of much money since I'm guessing a florist would have charged anywhere from $75 to $100 for my bouquet and the girls' likely would have been upwards of $40 each.

Most important of all though, the good time we had making them and the insane sense of pride I feel every time I look at the photos of our flowers makes the half an hour of panic experienced on Friday worth it.

(Wow. Considering how panicked I was that day, I'm surprised I can even get those words out...)

Monday, July 12, 2010

the week of our wedding: flowers pt. 2

In case you're behind, catch up on the thrilling saga with part 1 here.

Okay, so where were we?

Oh yeah, it's the day before our wedding and I'm in a state of full panic. Did I mention how uncool that felt? It was the epitome of uncool.

With all our grocery store options exhausted and my refusal to pay an arm and a leg for cut flowers, we were running out of time in the city and were headed back to the cottage for the rehearsal. Before we left, however, we needed to make a pit stop at my grandmother's house to pick up the cupcakes which had been stores in her gigantic freezer. So I chronicled the horrendous flower situation to my ever-sympathetic grandmother. She promptly asked me why I was panicking when she had a garden full of beautiful flowers. Most specifically, she wondered why was I in a state of panic when her peony crop was in full bloom.

Can you say "relief"?

I couldn't believe the luck. I love peonies! So much so that I was disappointed a few months back when I was told that they don't usually bloom in our area until the middle of July. Well, guess what, this year they were early. Right in time for June 26th, in fact. A miracle? Probably not. But hey, I'll take what I can get.

So after 10 minutes of clipping peonies and me saying: "But nana, I don't want to take all of your flowers..." (to which she would always answer: "You only get married once, take as many as you want") we had 2 buckets full of peonies. White, dark pink, light pink. Enough for my bouquet, the Best Lady's bouquet and extra white ones which could provide filler to the bridesmaids bouquets if we needed it.

I could not have been happier. For about 5 seconds, I was disappointed that my bouquet which would now be comprised of spider mums and peonies wasn't going to be the handpicked wildflower bouquet I'd dreamed of. However, at that point in the day, I was so happy to have something that I didn't care.

To be honest, I'm proud of how I reacted to the whole thing. After months of researching bouquets and saving inspiration photos, the flowers we had collected the day before were the exact opposite of what I'd wanted. This could have easily been a major roadblock. A sobbing, cursing, depressed bride kind of roadblock. Thankfully, it wasn't.

This is a lesson learned.
If I could go back in time, I still what have gone the DIY route, so there's no regrets here. There is some hindsight though. My suggestion to the couples looking to DIY their flowers is that they need to be flexible with their flower choice. I'd heard that suggestion before but I ignored it because I figured that I could order what I wanted from a florist. But since I'd flip flopped so much on my flower choice and because the flowers I did like we often too expensive even to purchase by the stem, I had expectations out of line with my options. Bad idea.

So I say it again, if you're going to depend on grocery stores of Farmer Markets, be prepared to be flexible. If you have your heart set on a specific type of flower, order that kind from a florist and get the rest from a local source if the filler doesn't matter to you. For me, the lack of my favorites wasn't as upsetting as I'd thought. If you'd asked me 3 months ago if I would be okay with a bridal bouquet that didn't include dahlias, I probably would have said something along the lines of "hell no". Turns out, it didn't matter in the slightest to me after being faced with the possibility of having nothing.

Funny how a little panic can cure what ails you.
Or just make you realize that the presence of dahlias won't make or break your wedding day.
Silly me.

Part 3 (the assembly process) and photos (hopefully) coming soon.

Friday, July 9, 2010

the week of our wedding: flowers pt. 1

In the months leading up to our wedding, I had been told repeatedly that I shouldn't DIY our flowers. I was told that it would be too stressful, that I wouldn't have enough time in the days before our wedding, or... worse of all, that I couldn't make something as nice as what a florist could create (the gall, I know).

In spite of this, I was determined. I'd spent months researching and reading about how to make bouquets and I'd even practiced a couple of times. I knew I could do it and I was determined to. Not only because it would save us money but because I knew I'd have fun making the bouquets with my bridesmaids. That's right, fun. Not stress.

I had spent the weeks leading up to the wedding scouring the various supermarkets in the city that sold flowers. For me, a florist was always going to be too expensive, even if we simply ordered the flowers from one and put them together ourselves. And when the grocery stores in our area had prices like 3 bouquets for $24.99, how could I resist? Although the bouquets were too small to make one substantial enough for a bridesmaid or bridal bouquet, I knew it would be simple enough to combine as many as we needed to make a well proportioned bouquet. Even if that meant buying 10 bouquets, it would still be cheaper than a florist. So, there you have it, the price works out.

What didn't work out was the selection. Okay, I'll be truthful, part of the selection didn't work out. We ended up finding the bouquets for the bridesmaids at Costco. They were white and green, exactly as my maid of honor/sister had requested when I asked her. The only problem? There was only 2. Only 2 of the perfect bouquets. And since I had 3 ladies on my side, that was an issue.

Yep, it was an issue.... for about 5 seconds. I quickly realized that the Costco bouquets were actually quite large. Like, really big. Too big for one girl. So my mom and I decided to buy the 2 that they had, split them up and turn it into 3. Perfection. Problem solved. Phew, what a hurdle, that was scary for a second. Glad we got past that.

Little did I know, that was the least of my problems with flowers.

Unfortunately, I couldn't find anything at Costco for my bouquet. None of the flowers really caught my fancy, but we decided that it was no problem since we still had 2 grocery stores to visit.

We arrived at the first grocery stores to find some bright pink Gerbera daisies which would serve as the perfect bouquet for the flower girls. Yet, still, they too had nothing for the bridal bouquet. Okay, starting to panic. But trying to keep calm since I knew there was one more store. And this store was the one that usually had the best selection out of the 2.

However, upon entering the last grocery store, full on panic set in. For some reason, the selection of flowers available at the store sucked the day before our wedding. Two weeks before, they'd been fine. The Tuesday before our wedding, they were amazing. This had boosted my confidence.

That Friday caused all that confidence to crumble. Although they had the flowers I wanted, the colors weren't right and the quality wasn't amazing. Some were droopy and some were just flat out losing petals and leaves. They did however, have an amazing selection of spider mums, which I promptly bought even though they didn't really fit with the handpicked wildflower bouquet of my dreams.

Not cool. I remember panicking about the possibility that I would have a bouquet comprised solely of spider mums. Pretty, but not my thing.

And of course, since I was stressing, so too was my mother. Who, at one point, took the time to kick me while I was down by reminding me that if I'd gone with a florist, we wouldn't have had this stressful problem to deal with. Thanks, mom.

However, she was right. If we'd hired a florist, I wouldn't have had to think about the flowers at all. But at the same time, the things she doesn't see is that the money saved and my feeling of accomplishment for having made my own bouquet are worth all the stress I was feeling at that moment.

Thankfully, in spite of all the crazy stress, my grandmother had the perfect solution to my bouquet debacle sitting right in her impeccable garden.

Stay tuned for Part 2!

Friday, January 15, 2010

once in a blue moon

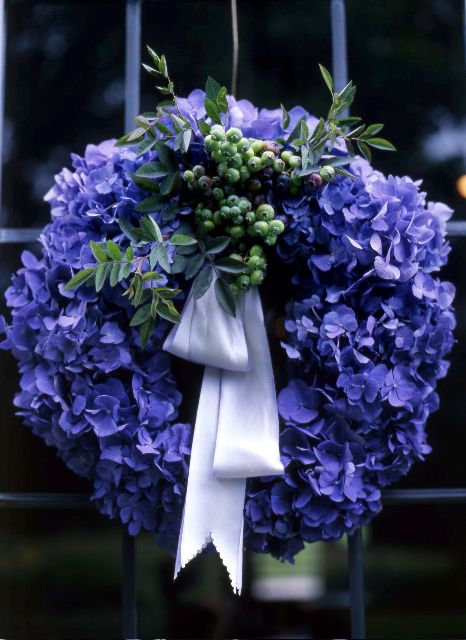
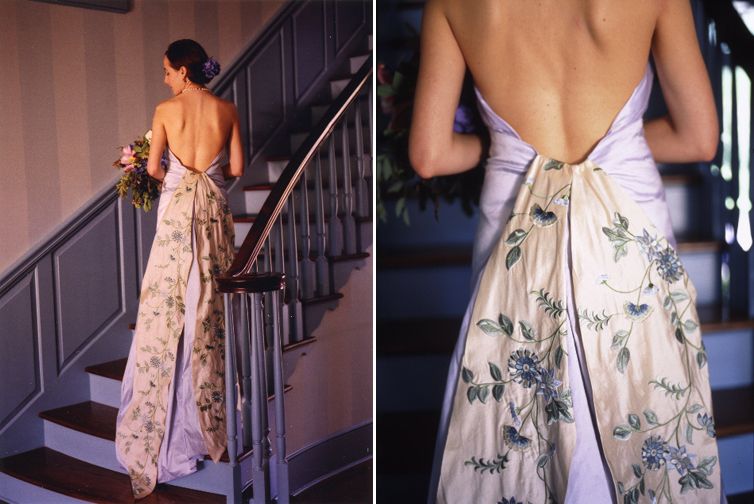
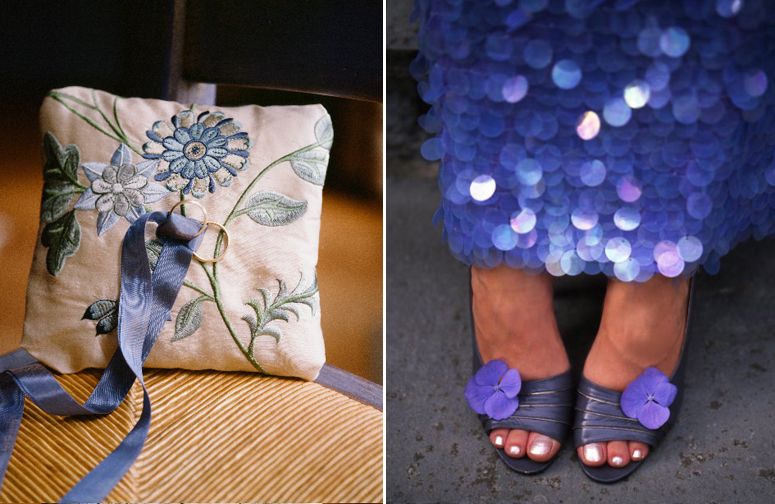
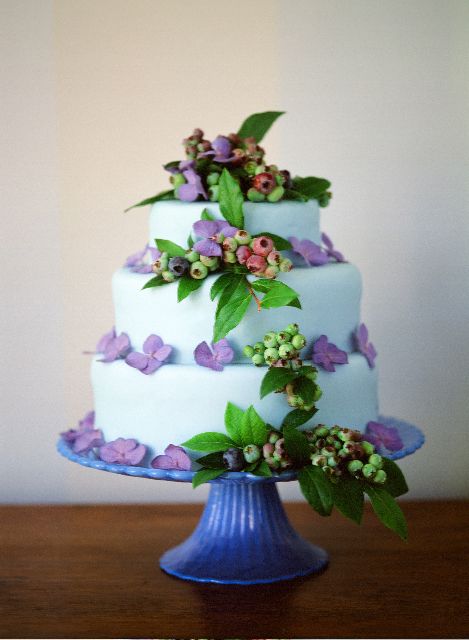
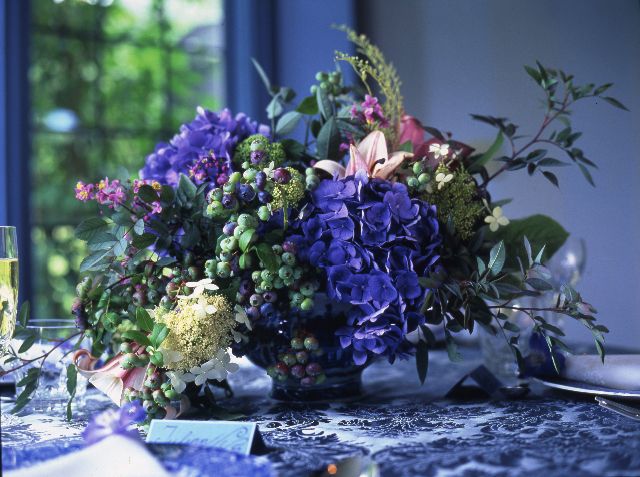
I saw such a gorgeous morsel of wedding inspiration by Ariella Chezar and Meg Smith on one of my favorite blogs, Snippet & Ink, that I couldn't resist borrowing it.

These wedding ideas are the best expression of blues and purples I have ever seen. Plus the combination of blueberries and hydrangeas which is entirely unexpected and completely amazing.

If I were going to devote myself to a color combination, this would be it ... *swoon*.


Monday, January 4, 2010

DIY: Flowers

I've mentioned my resistance to paying a florist for something I can do myself in previous posts (for centerpieces here and here; and for boutonnieres here) and this philosophy will carry me through the creation of my bouquet as well. Although I have nothing against florists since they do some amazing work and who are usually far more creative than myself when it comes to arranging flowers ... we just don't have it in the wedding budget to have 15 centerpieces of cut flowers or pay $100 for my bridal bouquet when I could buy the flowers at cost and arrange them myself.

When we first got engaged, I was panicked about how much it would cost to get centerpieces made because I have rather expensive tastes when it comes to fresh, cut flower centerpieces until I realized that I didn't need to have a florist. Though it took me an embarrassingly long time to realize it, I didn't need to pay someone that much money and though some family members still disapprove of the idea, I'm determined to pull it off. As much as the wedding industry would like to convince us that florists and $2,500 worth of flowers will make or break out wedding day, it simply isn't true.

And to insert a little humor into this discussion, I laugh every single time I watch this video ...


Thankfully, the style of bouquet that I've fallen in love with falls more within the hand-picked look than the structured arrangements of more formal weddings. Since hand-picked bouquets are supposed to look ... well, hand-picked, it should be less stressful to create this style of bouquet whereas if I wanted a bouquet of 25 red roses in a perfect circle, I'd most likely be forced to pay a professional to create that for me.


And for other brides like myself there are tons of resources both online and in wedding magazines for those looking for a little guidance throughout the process. Luckily, I've found some wonderful tutorials online and my favorite of the bunch includes my favorite flowers ... dahlias.

From Design Sponge comes this tutorial which chronicles the journey to create a casual picnic-style bouquet from flowers purchased at a local farmer's market. Unfortunately, I'm not as lucky as the blogger who made this tutorial as they are very few farmer's markets in my area dedicated to flowers or which even feature a decent selection of flowers. Because of this, I've decided to order the flowers from a local flower shop so I can make sure to get the flowers and colors I really love.


I am 100% in love with this bouquet mainly for the dahlias and the colors used, though I'll be leaning more towards purples than pinks. And although I know it'll be a lot of work and probably cause more frustration than I'll need during the last week of wedding prep, I think it'll be worth it to have a bouquet entirely customized to me.

Friday, January 1, 2010

Herbal Boutonnieres

I've fallen in love. Again.

But this time, it's with these boutonnieres.


I found this tutorial on Once Wed and they seem fairly simply to recreate. I've always intended to make the boutonnieres myself. I have no desire to pay a florist a ridiculous amount of money for labor when I could do it myself. In fact, as far as flowers for the wedding goes, that's my intention across the board. I plan on making my own bouquet with a little help from my family, bridesmaids and DIY tutorials I've found online in a fresh-picked sort of style, so these should match it perfectly.

Another great feature of these boutonnieres is the opportunity to incorporate herbs and flowers which are unique to us as a couple. Case in point, if we settle on this type of boutonnieres, I'll be using rosemary because it's an ingredient in one of Mr. FP's favorite recipes (which came from this vegetarian food blog which I recently discovered) and lavender because it's the scent of the bubble bath Mr. FP bought me when we moved in to our first apartment together.

Not only will they be personalized, but they'll smell great. And if one of the groomsmen has really bad breath before the ceremony, he can just pull the mint out of his boutonniere and chew on it for a while. Okay, I'm joking, but the general sentiment is the same ... I love them.